Welcome
Tutorials
Instructions
Level: Beginners
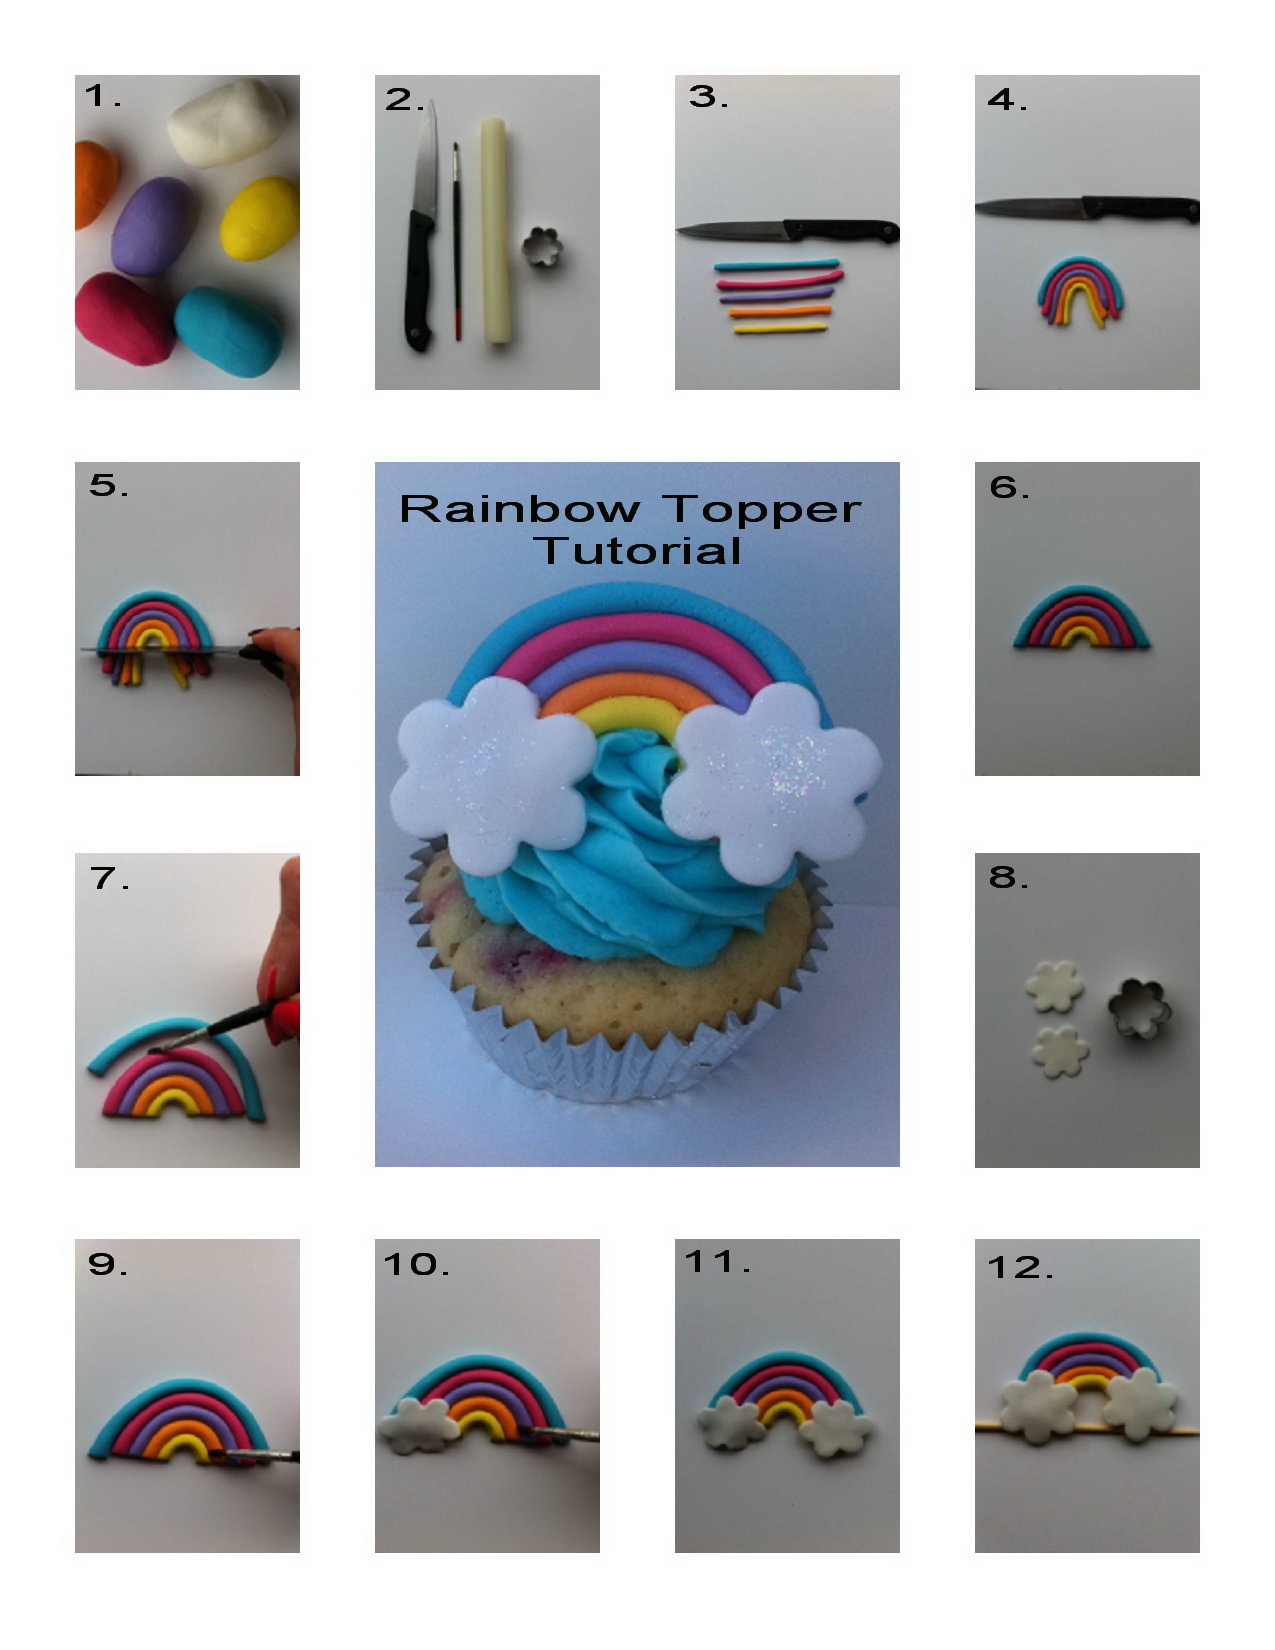
Tools Required: Fondant, Rolling Pin, Flower Cutter, Knife & Glue
- Mix several pieces of fondant to your chosen colours
- Knife, Rolling pin , paint brush & glue/water
- Roll sausauges of the same thickness & place in order of chosen pattern
- Arch fondant sauges in ‘Rainbow ‘ shape
- Line up your knofe in a straight line across the base
- Cut your Rainbow
- Use glue or water to attach each saugsage colour together
- Roll out white fondant & cut 2 flowers
- Using glue/water wet the bottom of both Rainbows
- Attach on flower
- Then the other
- Using a wooden skewer or tooth pick, place under the clouds to allow them to set- minimum 24 hours

Instructions
Level: Beginners
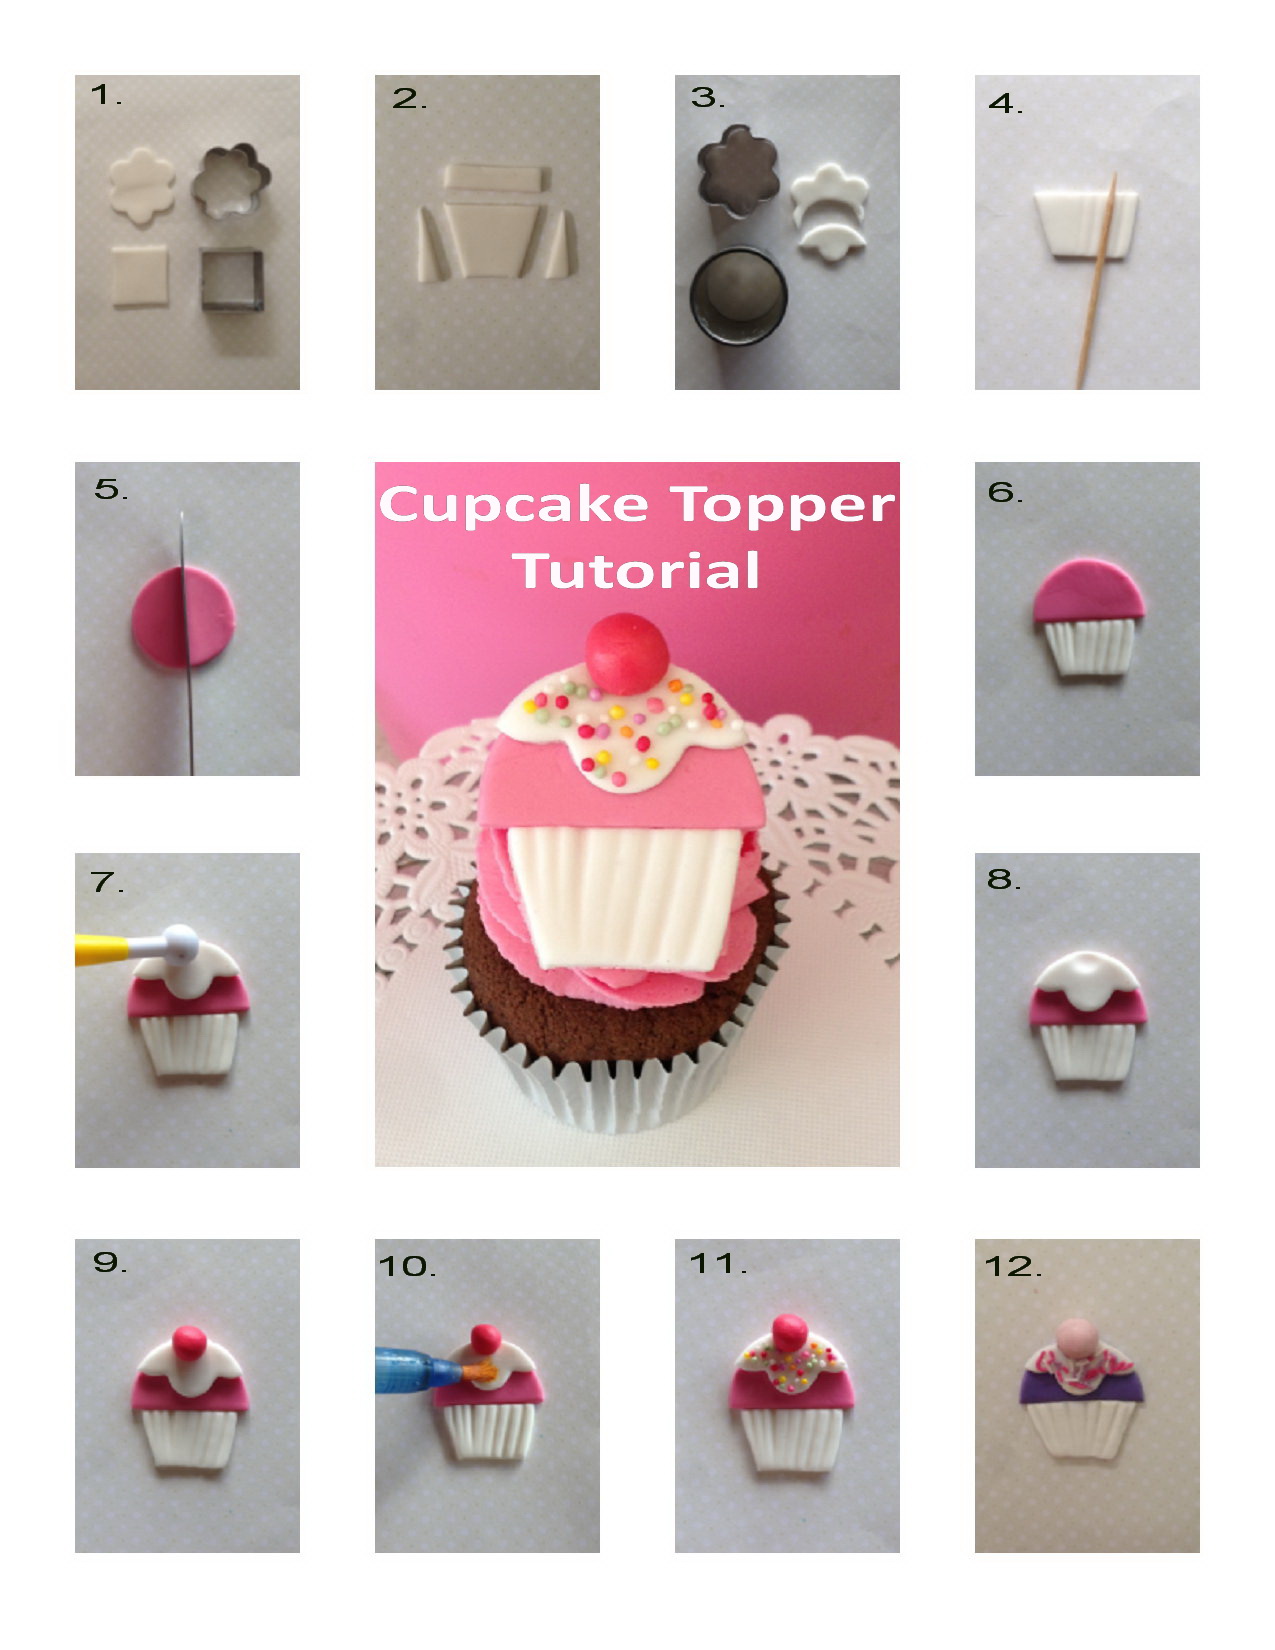
Tools Required: Fondant, Rolling Pin, Flower Cutter, Circle Cutter, Square Cutter Knife, Balling Tool (optional) & Glue
- 1. Roll out White Fondant to approx 2-3mm thick. Cut out a square & a Flower shape
- 2. Make 3 cuts with a plain bladed knife to form sloping sides
- 3. Using a circle cutter, cut the flower shape as pictured
- 4. Using a toothpick – mark grooves to achieve a ‘Cupcake Wrapper’ look.
- 5. Roll out Pink Fondant to approx 2-3mm thick. Cut into a circle shape. Using a plain bladed knife, then cut into half
- 6. Glue into place using flower glue ( or water) butting up against the Cupcake Wrapper.
- 7. Glue white “Cream” to your cupcake. Indent the top of your Cupcake with a Ball tool.
- 8. Add glue to your indentation
- 9. Roll & add a small ball shape “Cherry” to add to your Cupcake
- 10. Add Glue to the White Cream
- 11. Sprinkle 100’s & 1000’s onto your topper
- 12. Try different colour schemes..
Thanks for checking our Tutorial page- stay tuned for our next tutorial!
Baked from scratch everyday!

